


When I was trained at the Moscow design school, we had a whole module dedicated to creating photorealistic images in 3ds Max. If you at least once faced with this program, you can imagine how difficult it is. A million different buttons, settings, additional plugins. To understand the basics and create 5 more or less decent pictures of the kitchen-living room, it took me a month. A Month On, Carl! After that, I visualized a few more projects, but then came to the conclusion that it is better this phase will be delegated, because it takes me at him too much time and effort.
In addition to 3ds Max I tried to work in online programs, a more primitive and simple. Basically they were all foreign, with limited functionality in the free version. Ultimately, neither one of them did not suit me, because constantly pop up any difficulties, glitches, and the quality of the final image left much to be desired.
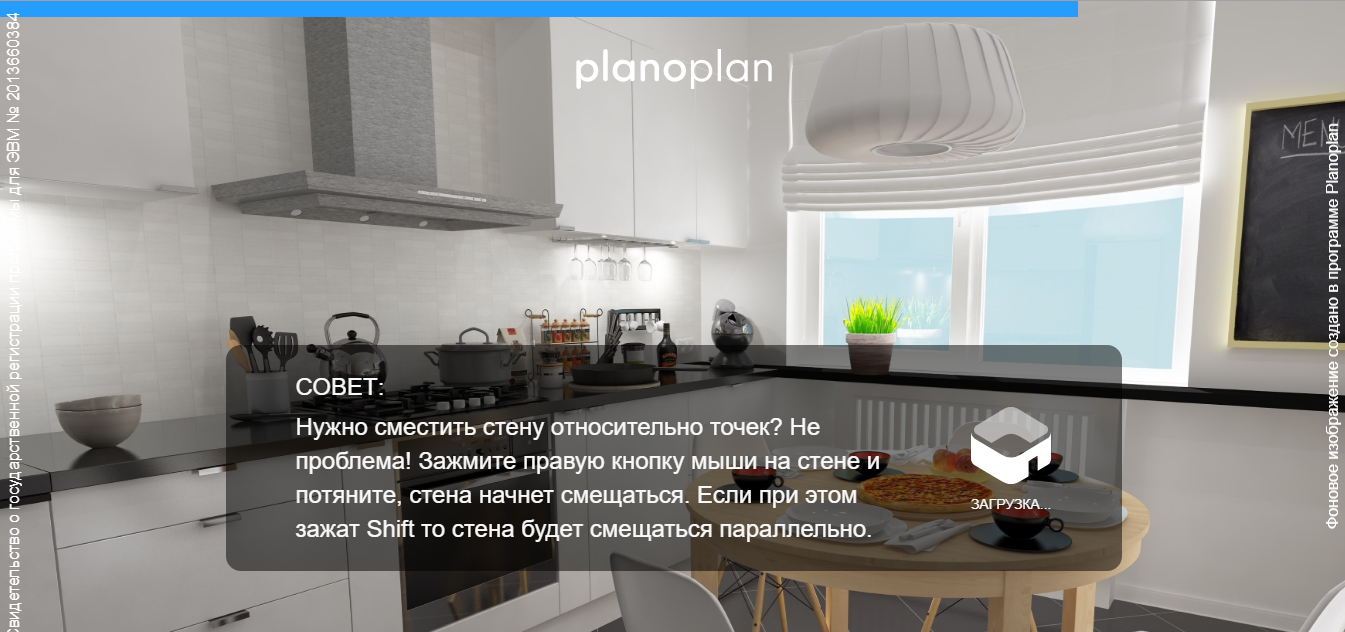
But one of these days the Internet came on Planoplan. This is an online 3D planner spaces, which will be very useful for those planning to do the repair. Yes, designer, you can replace it, but if you want to create a design project of their own, to try how comfortable different redevelopment options, “move” the furniture and see how it will look in the final picture of your interior in 3D is what you need!
I think now the new design of your bedroom, so spent a few days testing this software. Now I will share my impressions.
A little background information:
- Planoplan you have a free version and an enhanced (PRO). Cool what to try out all the functionality of an advanced account for free by connecting it to an hour. And if you like it and you’ll need to buy for a month, this time will be enough;
- This software can be used in the browser or download to your computer. Initially I wasn’t planning to install anything, because for me it is always stressful. Worked in Chrome. After some time I began to notice some glitches: for example, some of the furniture was not displayed in 3D + mode sometimes while loading everything freezes. Perhaps this is because of the galloping speed of my Internet, I don’t know, but I decided not to be annoyed once again, and still set Planoplan on the computer. It took about 2 minutes. This is what I have already done in the browser version gone nowhere, and synchronized. Another plus: in the process, all “fly” and loaded many times faster.
And now tell you step by step how to create the interior of your dreams with the help of the program:
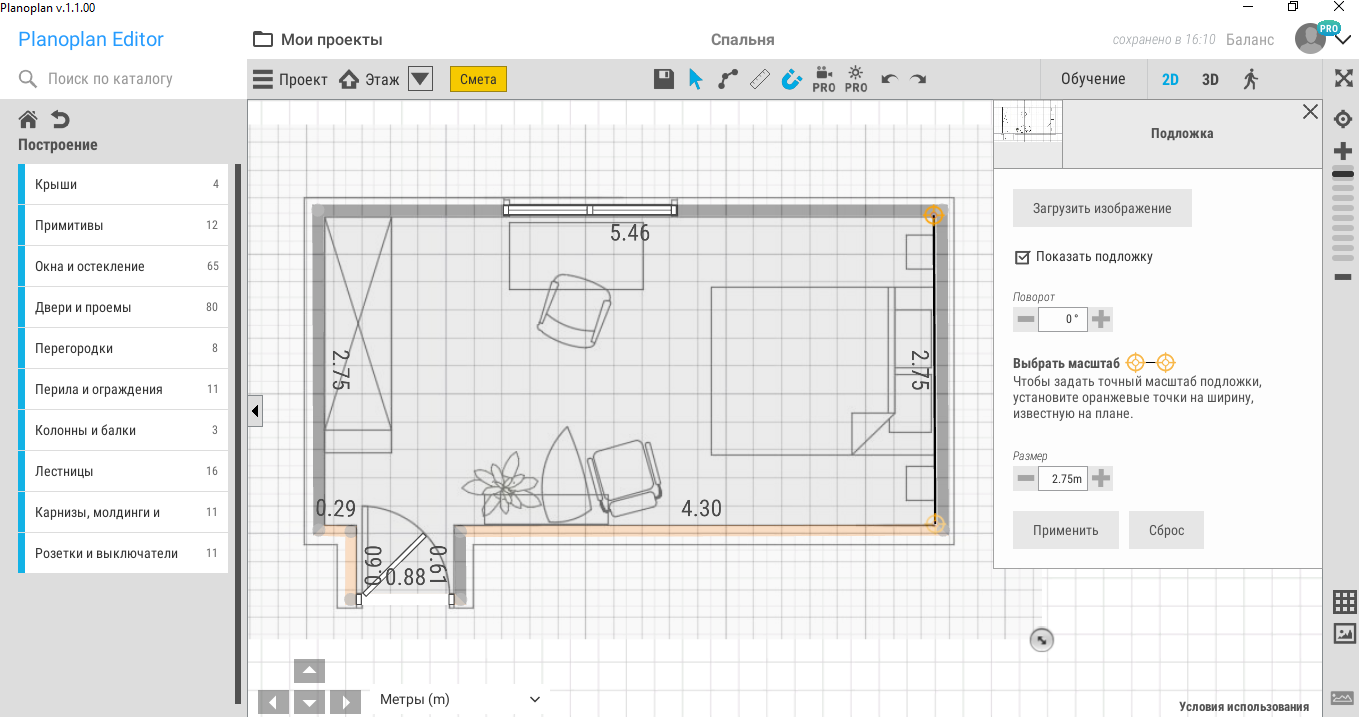
1. THE ERECTED WALL
This can be done in two ways: driving the desired dimensions of the walls manually, or, if there is a flat plan format .jpg, upload it as a substrate and directly on it to repeat all the walls. I premeditated placement of furniture in the bedroom and made a drawing in autocad, and took a print screen from there, so didn’t have to do everything from scratch. You can use the BTI plan or picture of the apartment from the Builder.
After the erection of the walls don’t forget to put in the right places of the doors and Windows. In fact, the program is very intuitive, and I didn’t experience any difficulties. The only thing that at first it was strange and a bit mad, work with the mouse. It’s different here, unlike 3ds Max and autocad, so it took me some time to adapt and not to clamp down on the mouse wheel instead of the right button. By the way, if you encounter any difficulties with the work in the program, you can watch short tutorial videos on Youtube.
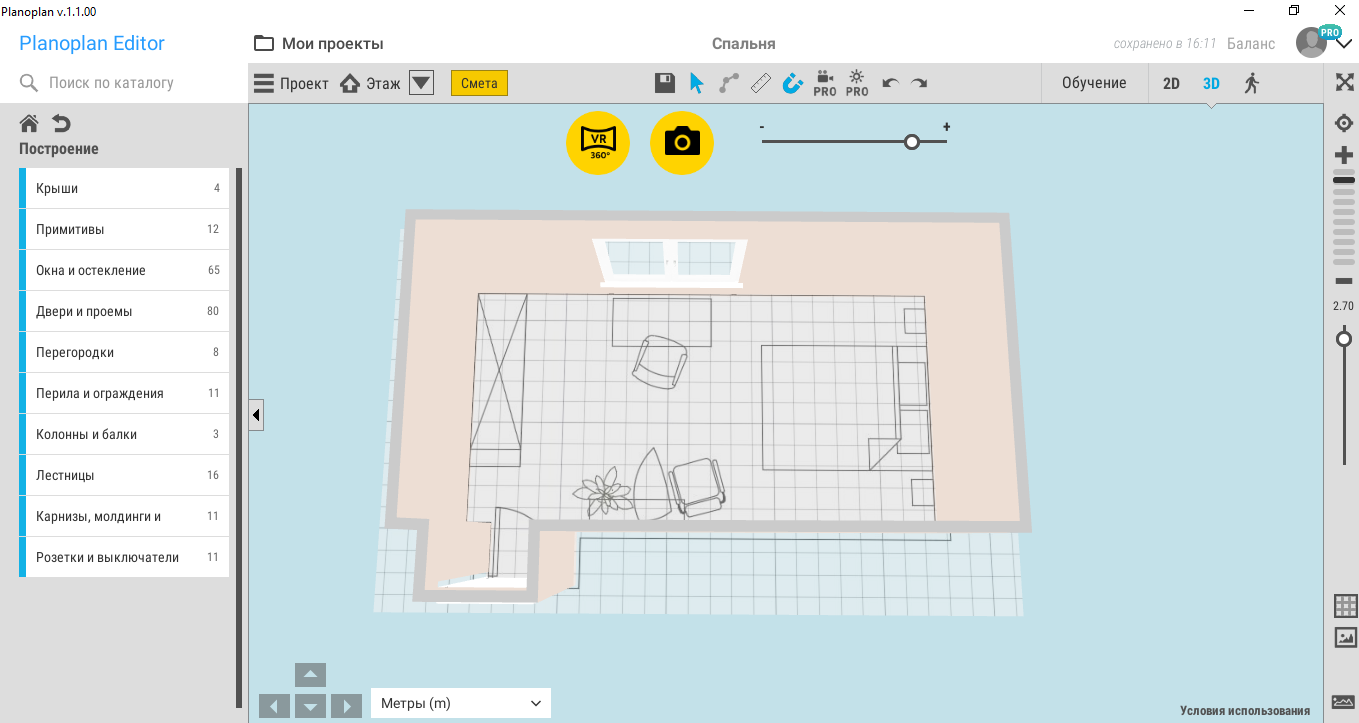
2. WE ARRANGE THE FURNITURE
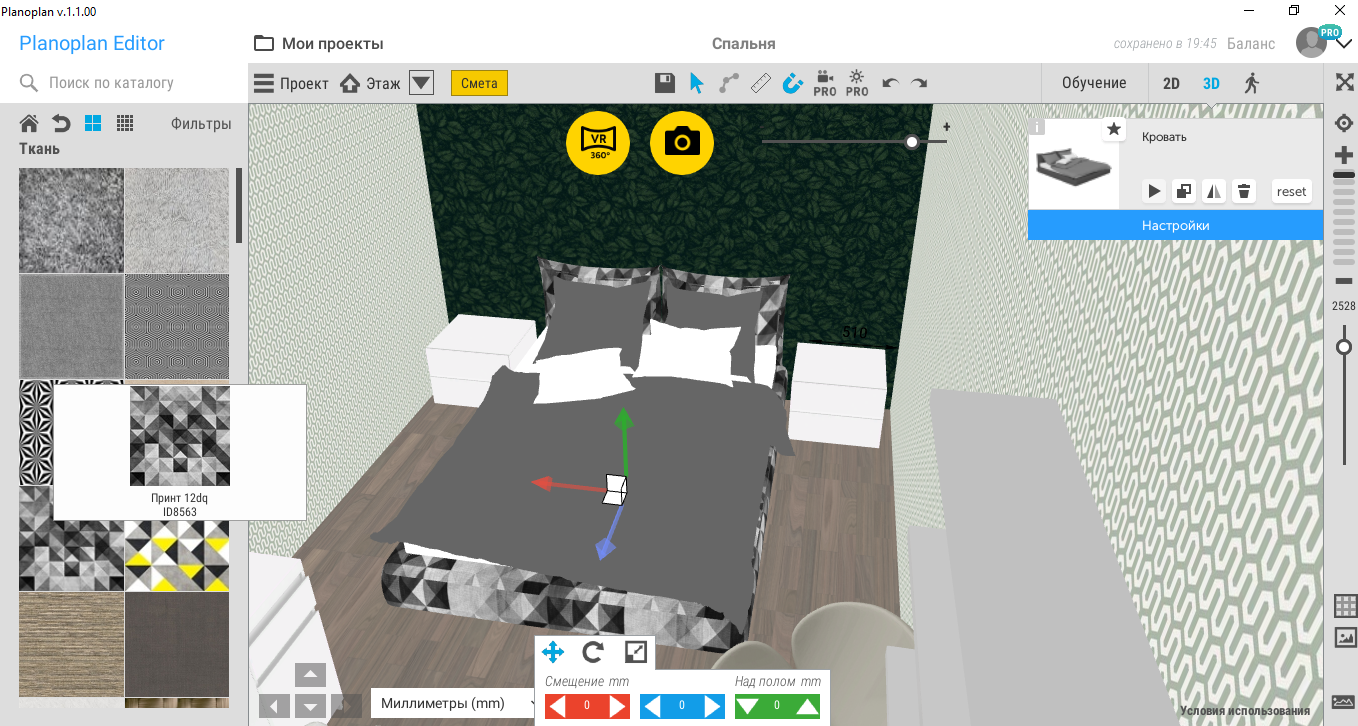
After all walls are erected, window/door delivered, time to move on to the furniture. This section presents a fairly wide selection of furniture. Pleased that among the variety of conditional tables/chairs/sofas are also the products of IKEA. It is a pity that did not find a table here, LISBAKKEN what I want to use in the reading area in front of the window. Had to find an alternative. By the way, the furniture can be changed and customized for your interior, which can not but rejoice.

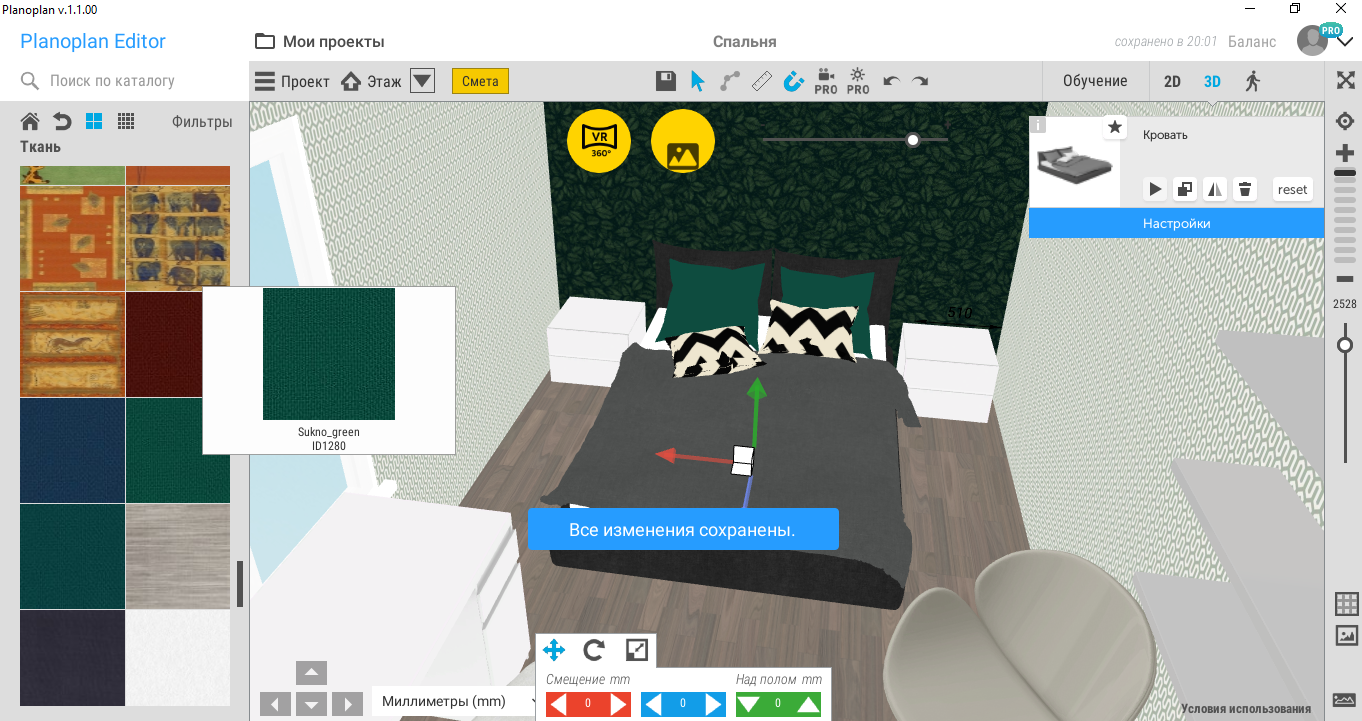
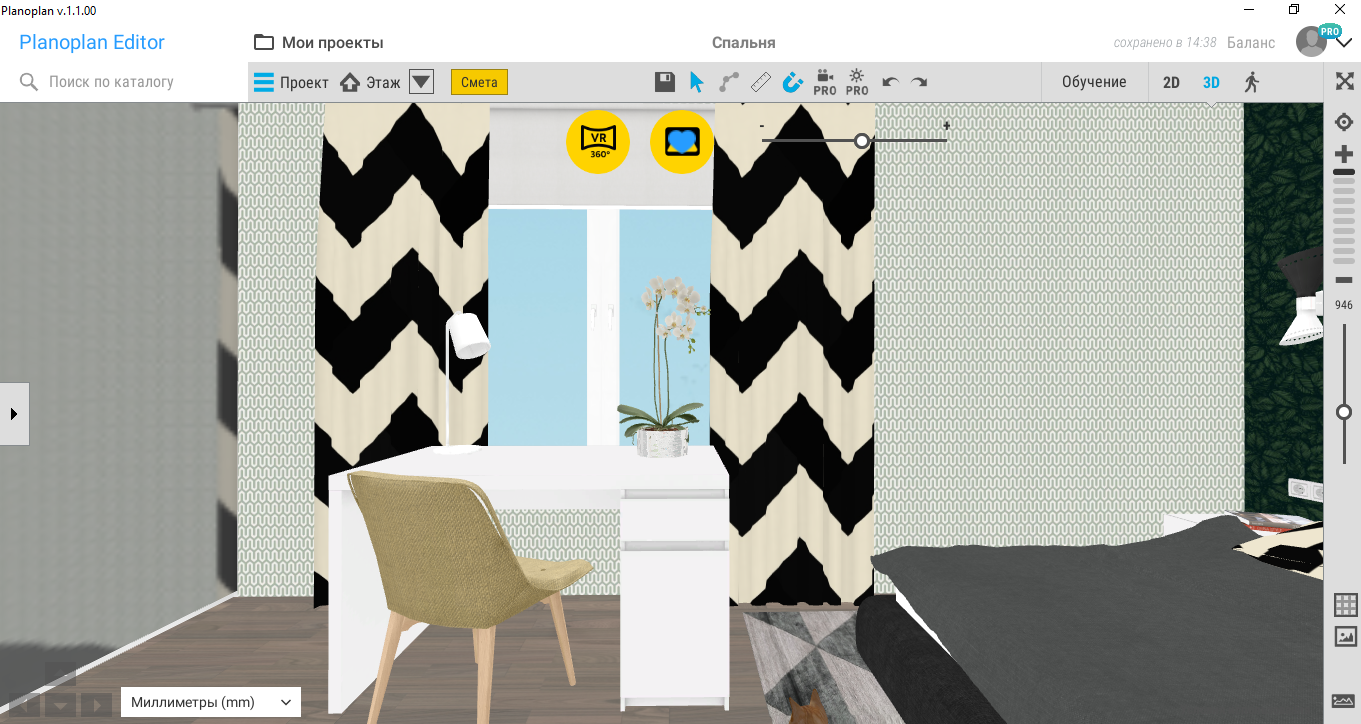
3. THE BLEND MATERIALS
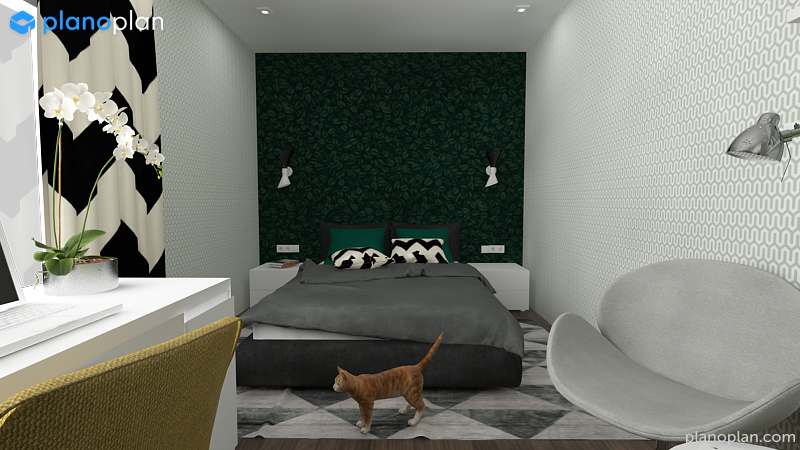
This phase is like a game of SIMS, remember this? I loved her! Put the floor texture, we select beautiful Wallpaper or paint, change of upholstery – and voila, the interior is immediately transformed, turning from a gray box into a cozy space. I decided the wall behind the bed to make accent and plastered it with Wallpaper rich emerald green, the other walls were more neutral.
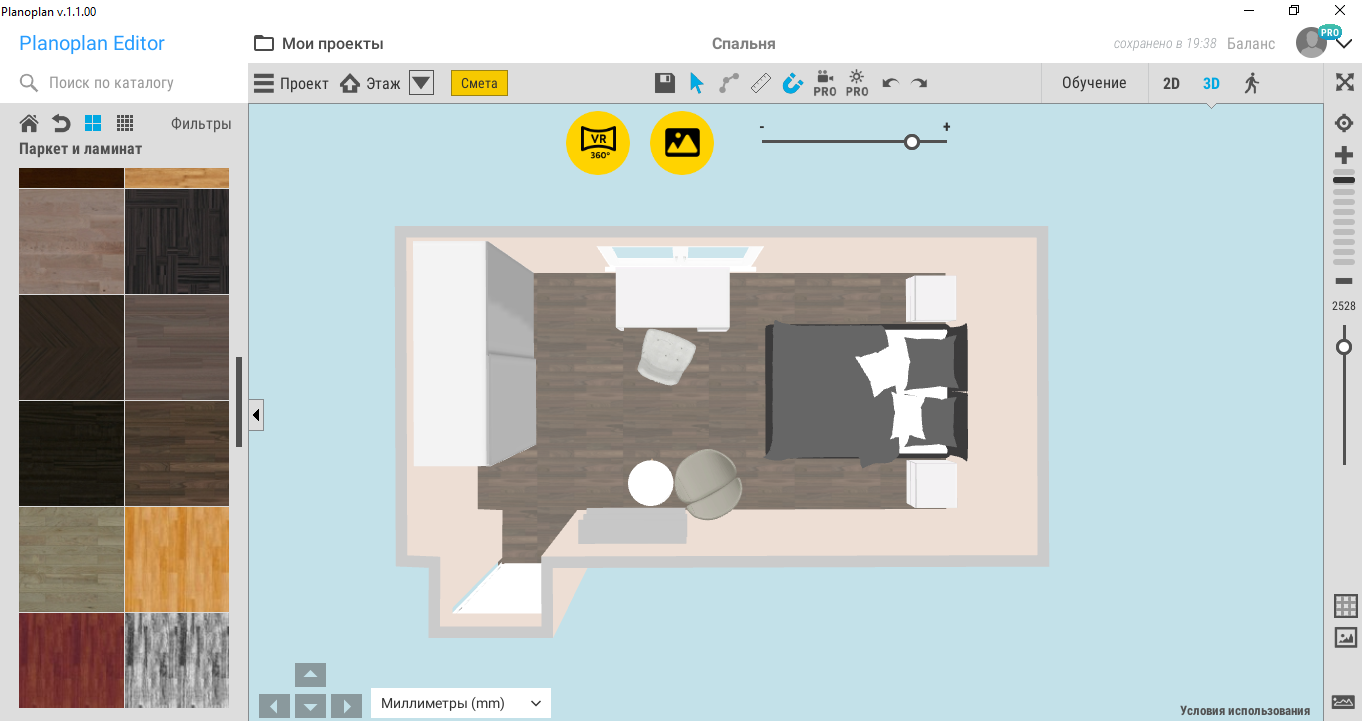
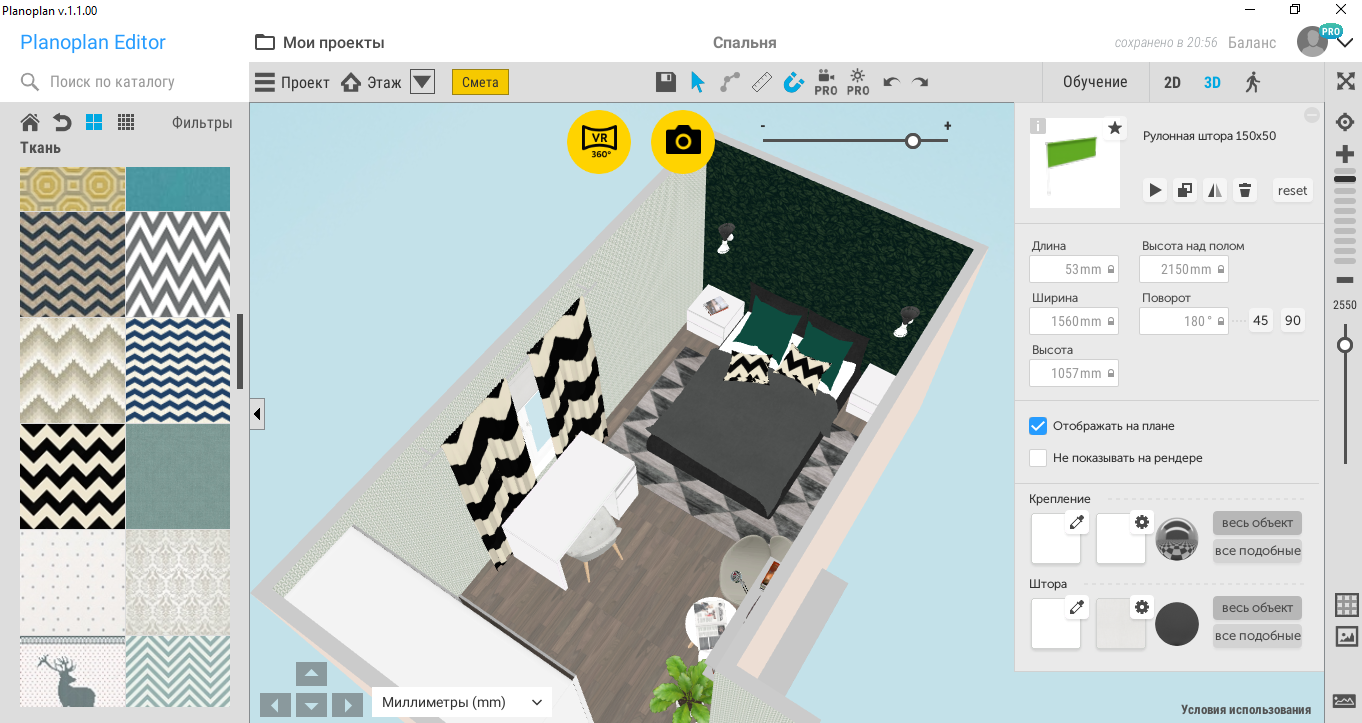
I liked the fact that you can change the material of furniture, textiles, and other content. I did trim the bed a darker, replaced the material of the bedspreads and using the eyedropper tool left on the pillow this pattern, as were the curtains. And, you can change the color of the metal, for example, you can replace the brass cornice on chrome and make it more glossy or, on the contrary, Matt.
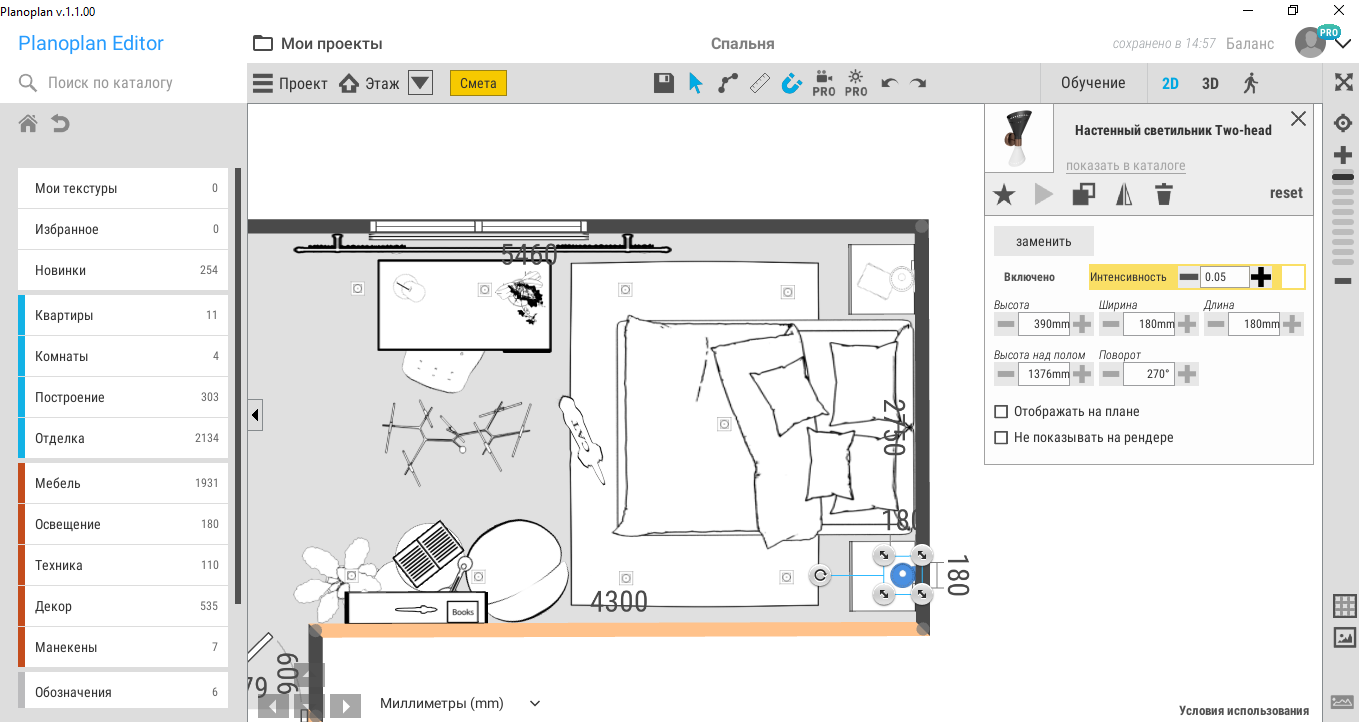
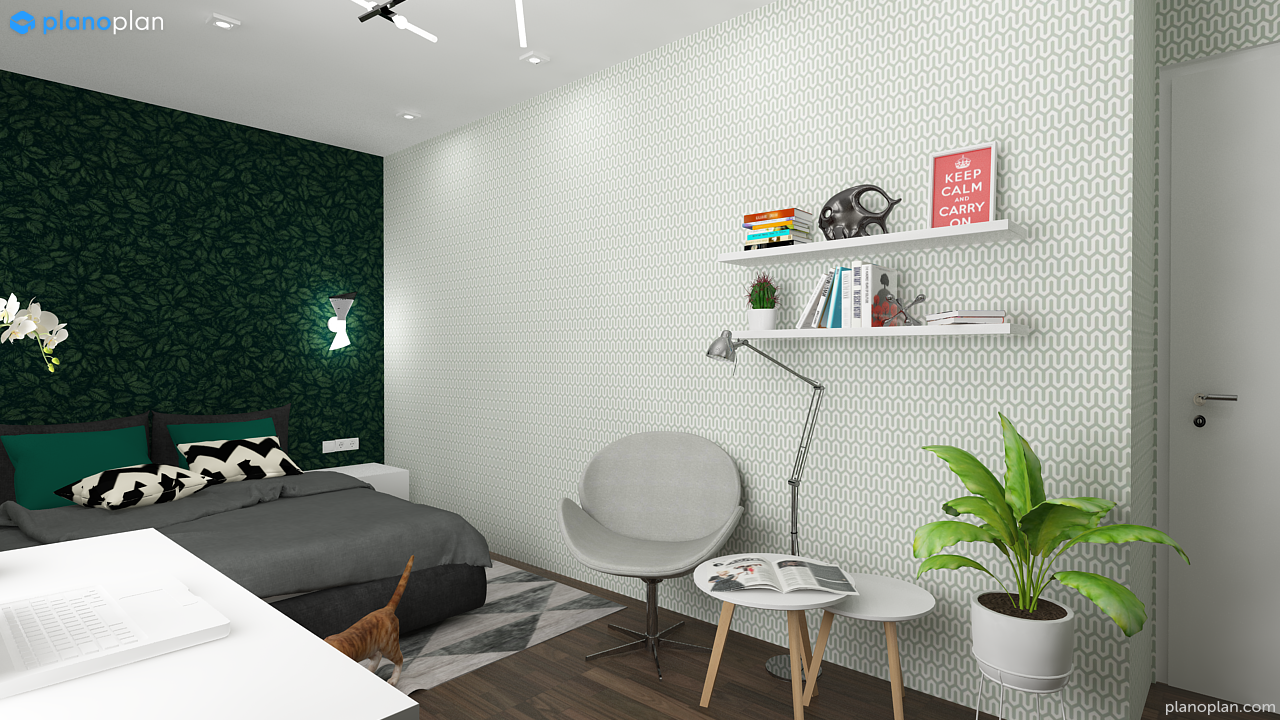
4. ADD LIGHTING
Can’t resist and not to give advice, as an interior designer: make sure that the lighting in the room was tiered. One chandelier is not enough even for a small room! Complement the ceiling lights can be floor lamps, wall lamps, table lamps, decorative illumination.
Now with regards to the program. Any light source can be turned on or off + you are able to self-regulate its intensity depending on the desired lighting scenario. I do not remember any online program where you would do)) a Very cool option! Still have the opportunity to add outlets/switches, they add more realism to the final image.
By the way, for those who are seriously going for repair, the program includes the “notebook repair”, where it is stored scan the walls, displaying locations for outlets and switches.
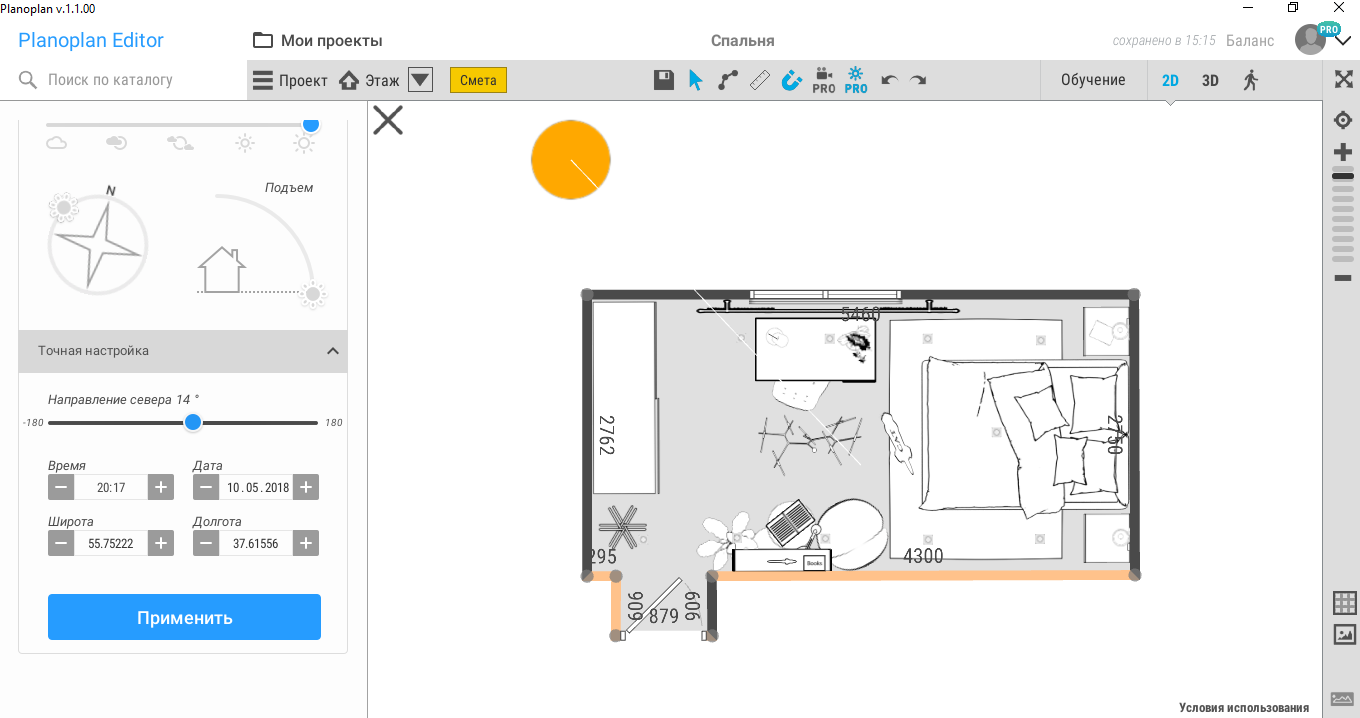
If we talk about natural light, here too, there is nothing to “play” in the PRO mode. I have posted different times of the day, changed location and brightness of the sun, to see how the room will look in bright daylight and in the evening with lights on.
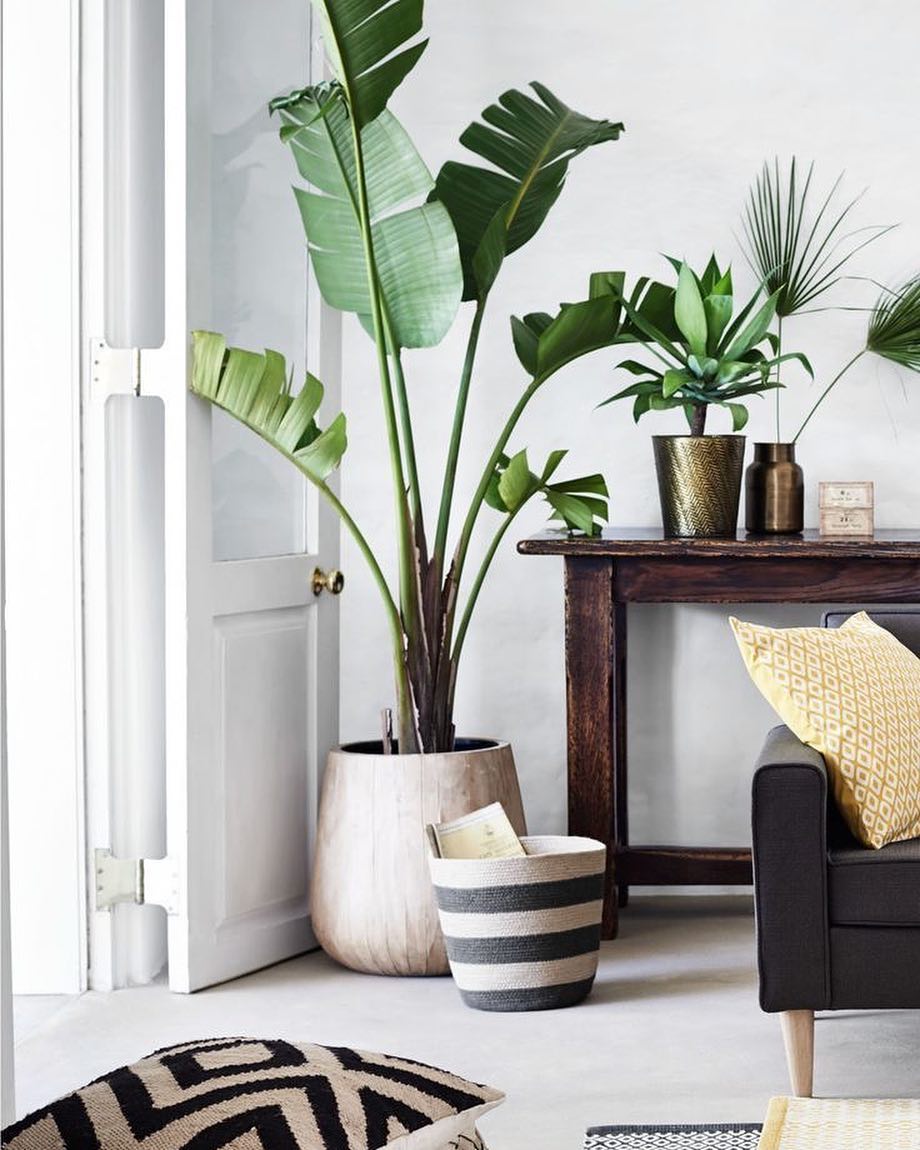
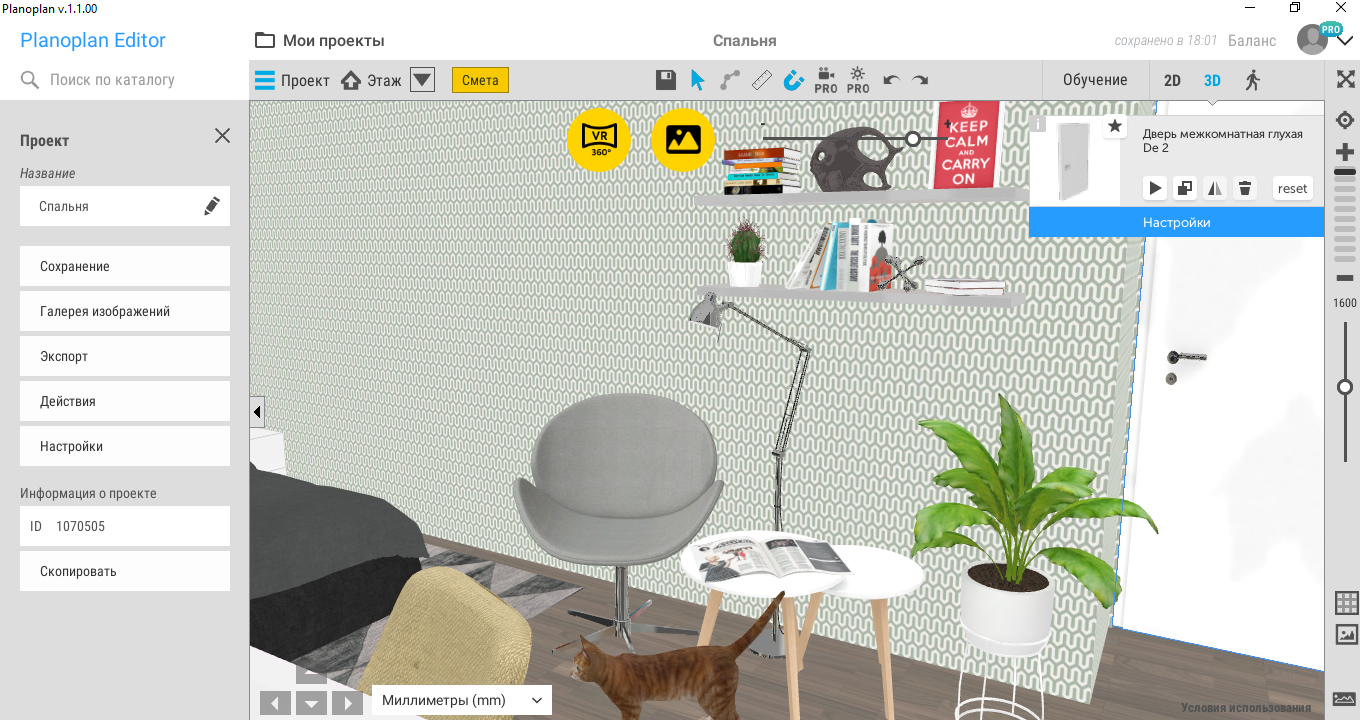
5. ADDED DECOR
I really like this stage, it is like the icing on the cake – gives perfection throughout the interior. Do not neglect the decoration, because without the small details the overall picture will look uncomfortable and lifeless. I even added a cat, couldn’t resist:)
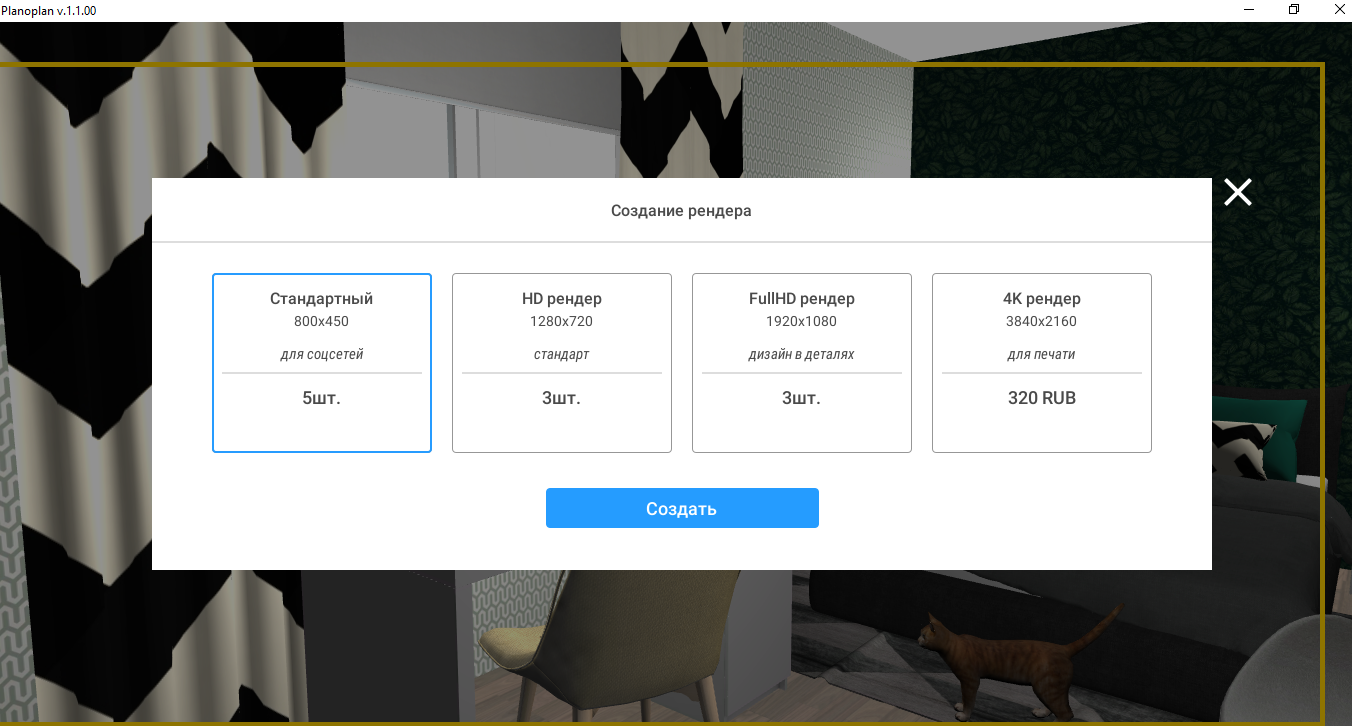
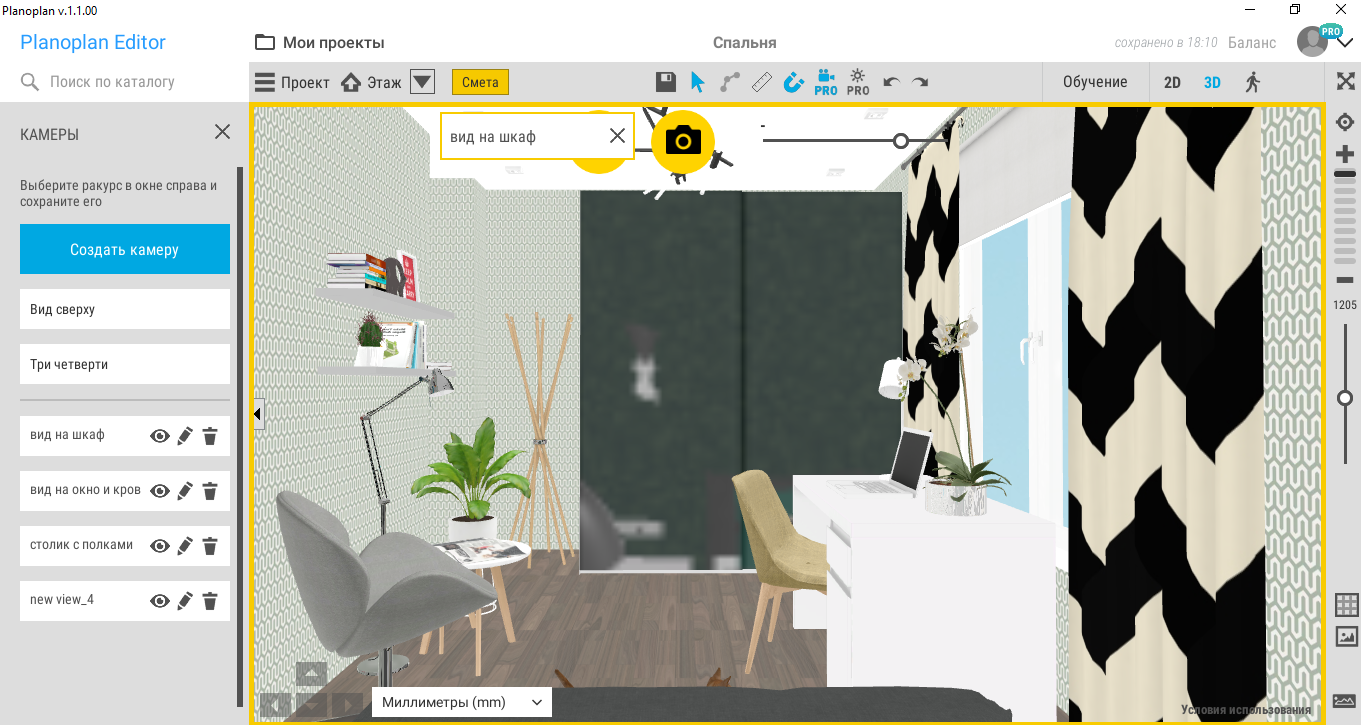
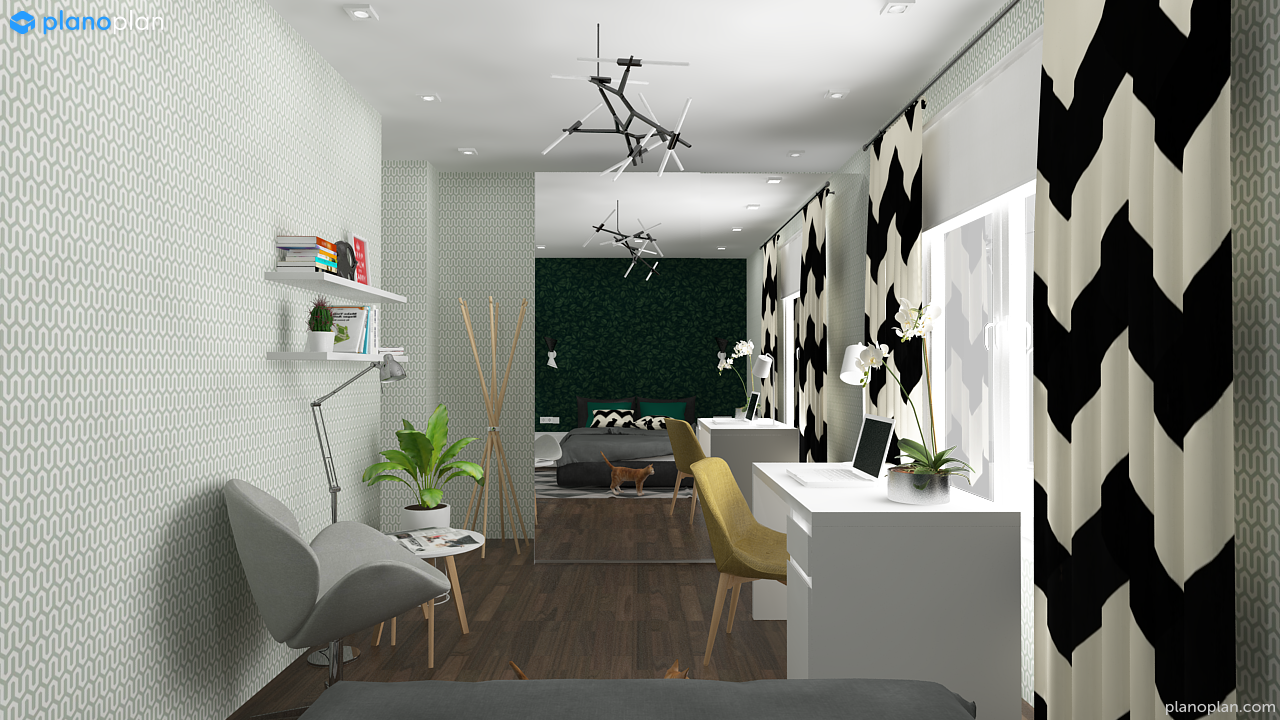
6. GET BEAUTIFUL IMAGES OF INTERIOR
Everything you see in the previous pictures, this 3D mode, but not renders. Renderings represent realistic images of the interior, on which there is light, shadows, glare, reflections. You understand, 3-4 rendering in 3ds Max, it took me all night (I left the computer turned on while I miscalculated the final image). So despite the fact that the computer I have is quite powerful and was purchased specifically for this purpose. Here is one image takes 5-10 minutes depending on size.
Here for comparison pictures from 3D + renderings:
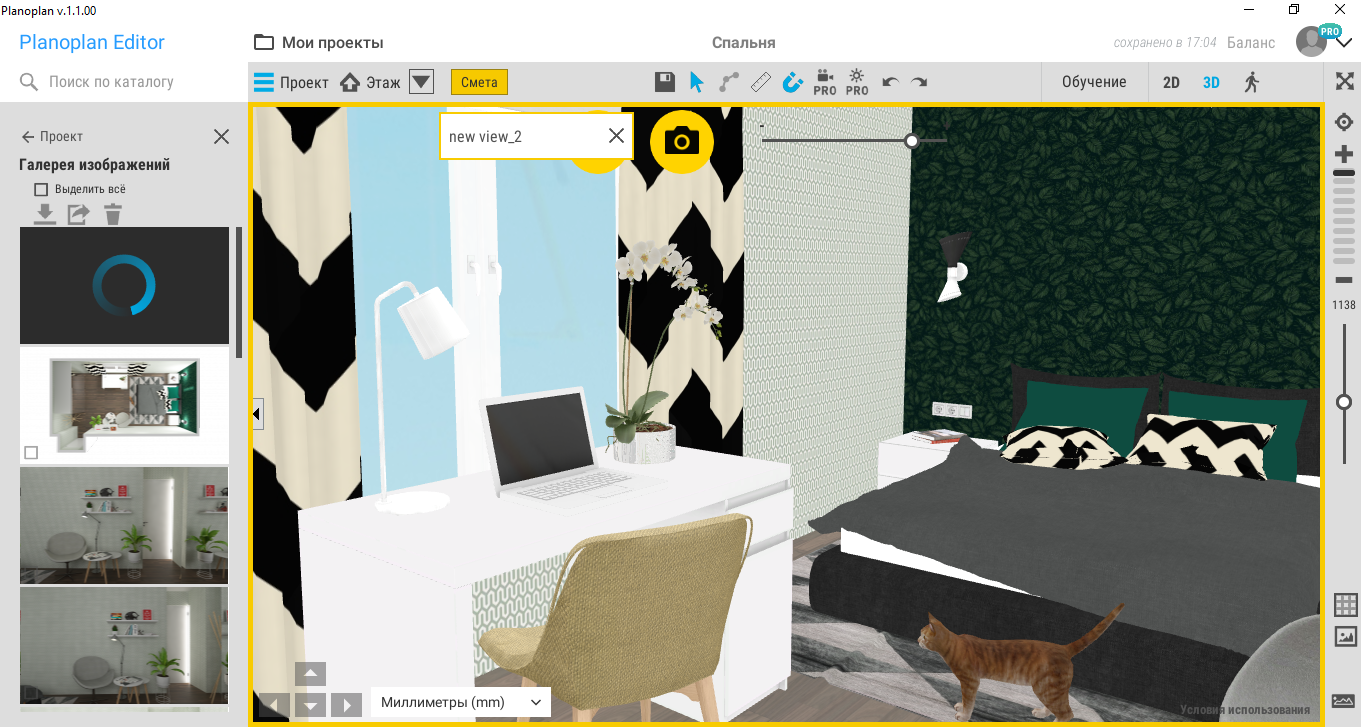
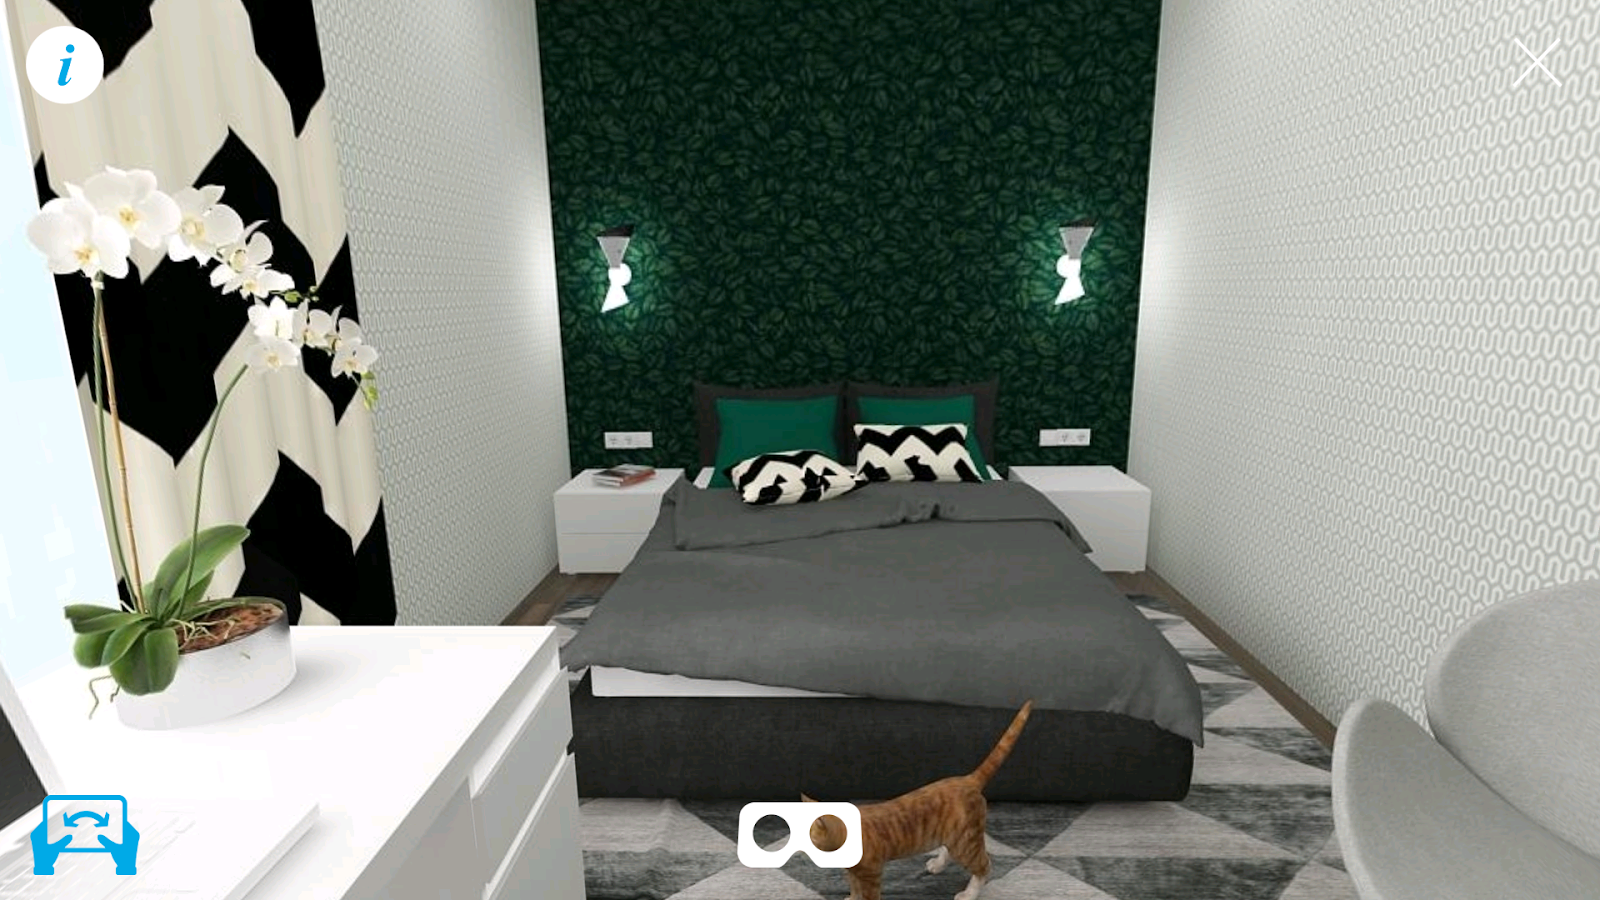
3D mode
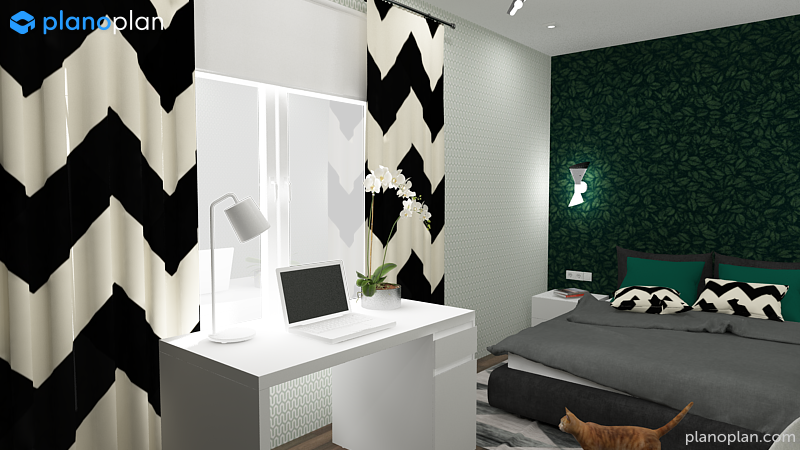
Render
3D mode
Render
3D mode
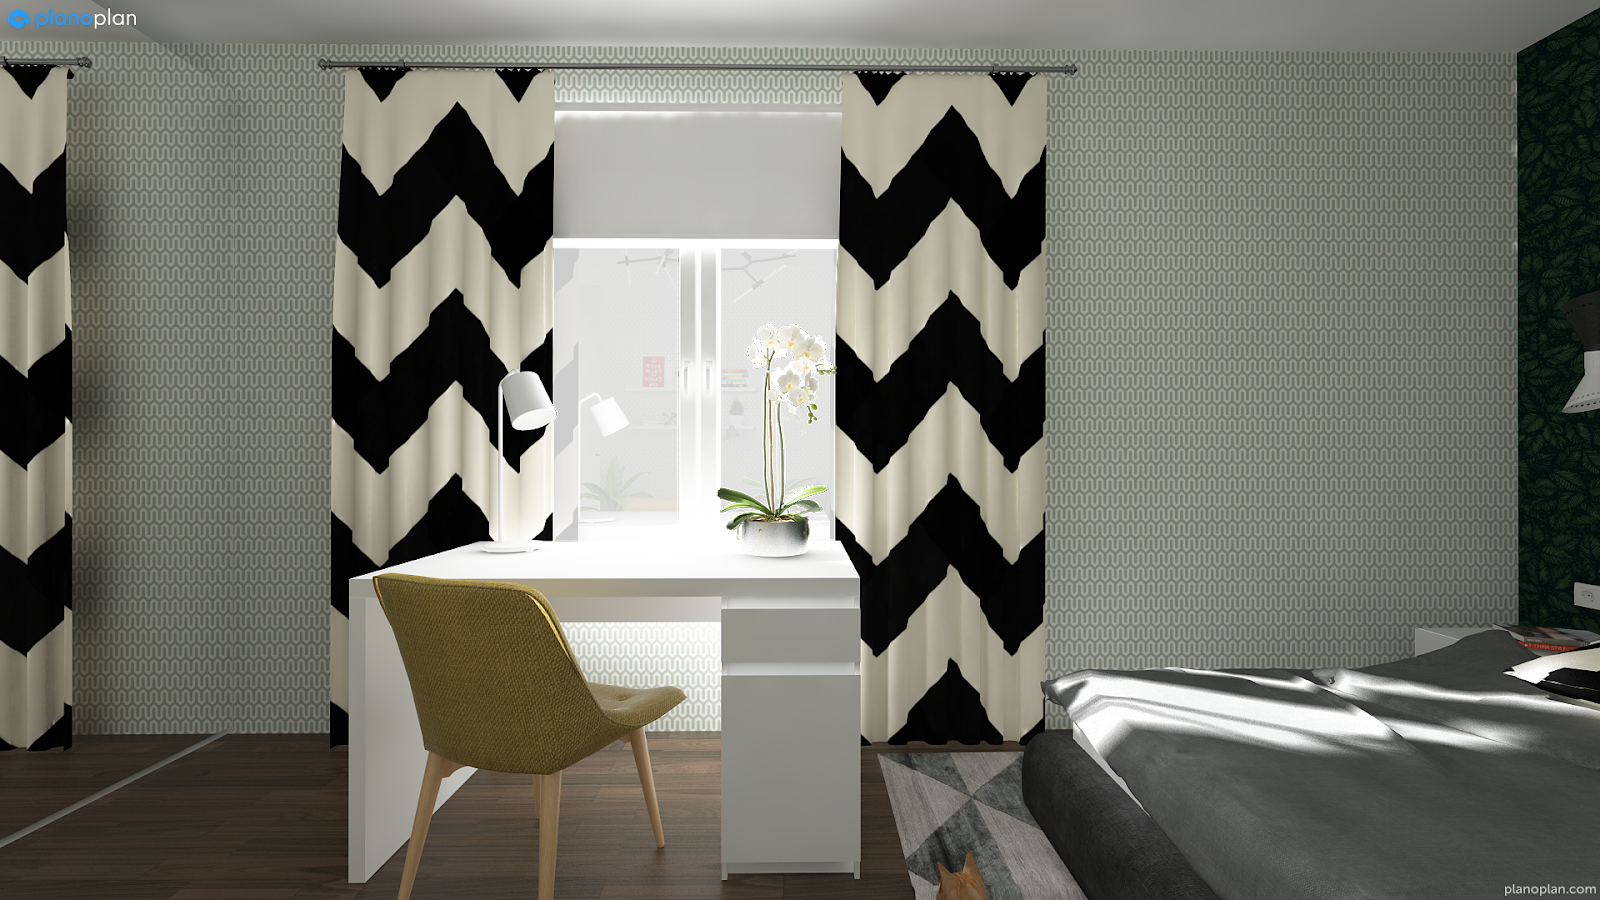
Render
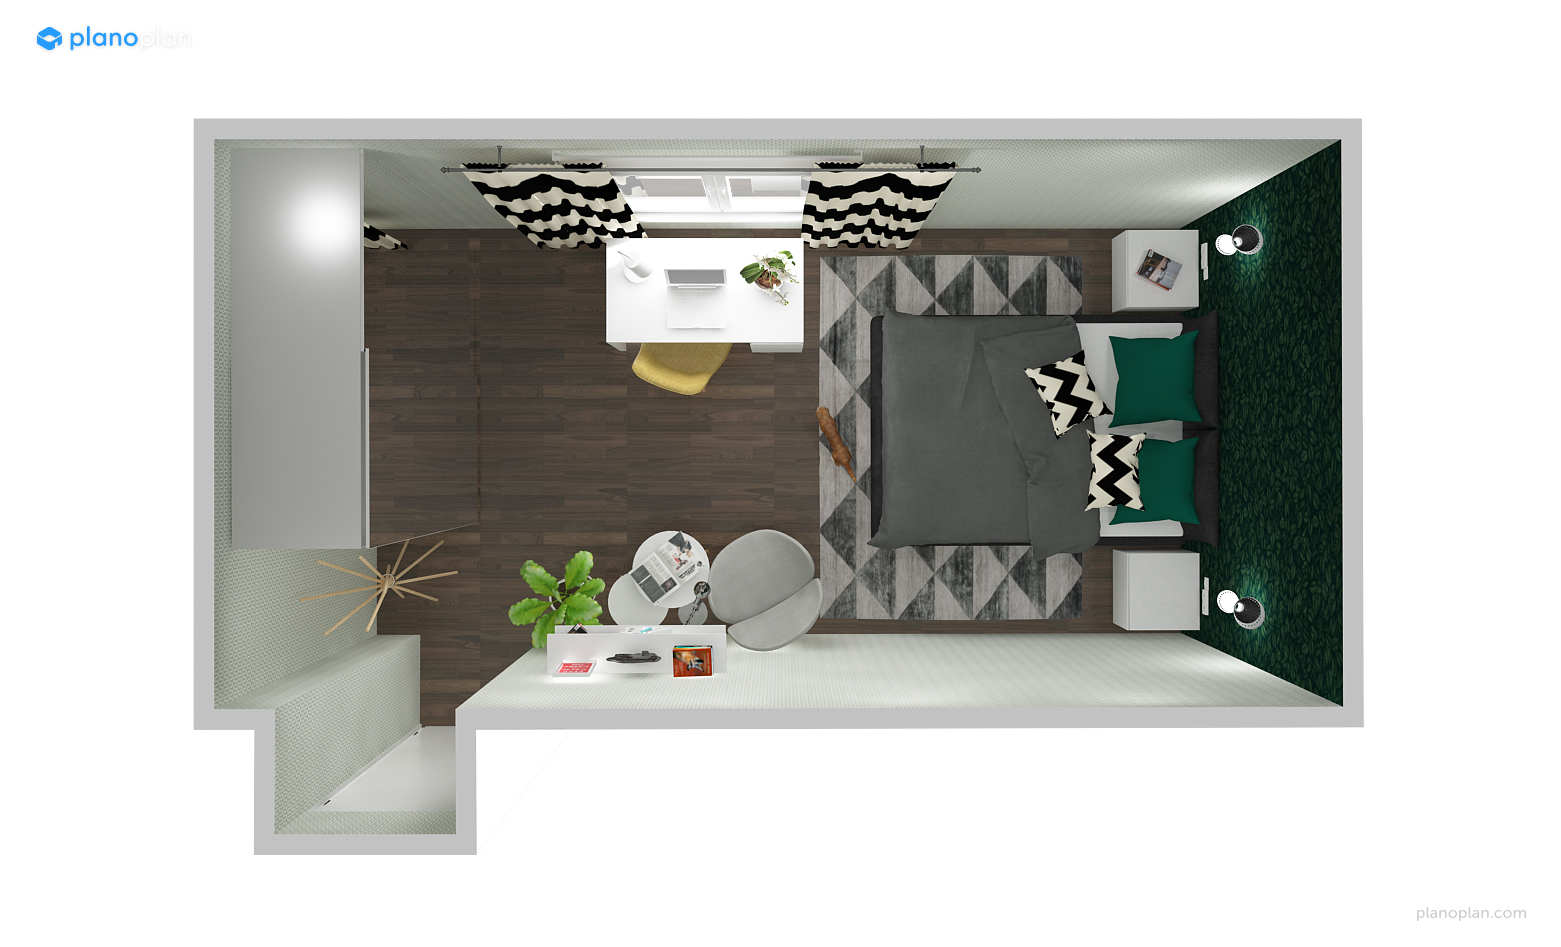
Render top view
Beautiful images hardly a surprise, but the picture in the format of virtual reality is already more interesting, right?! I had about six months hearing rave reviews from colleagues about similar VR panoramas, but never alone they created and thought they are available only to the elect) But as it turned out, mere mortals, too, can easily make a spherical panorama in 360 degrees and walk in its interior.
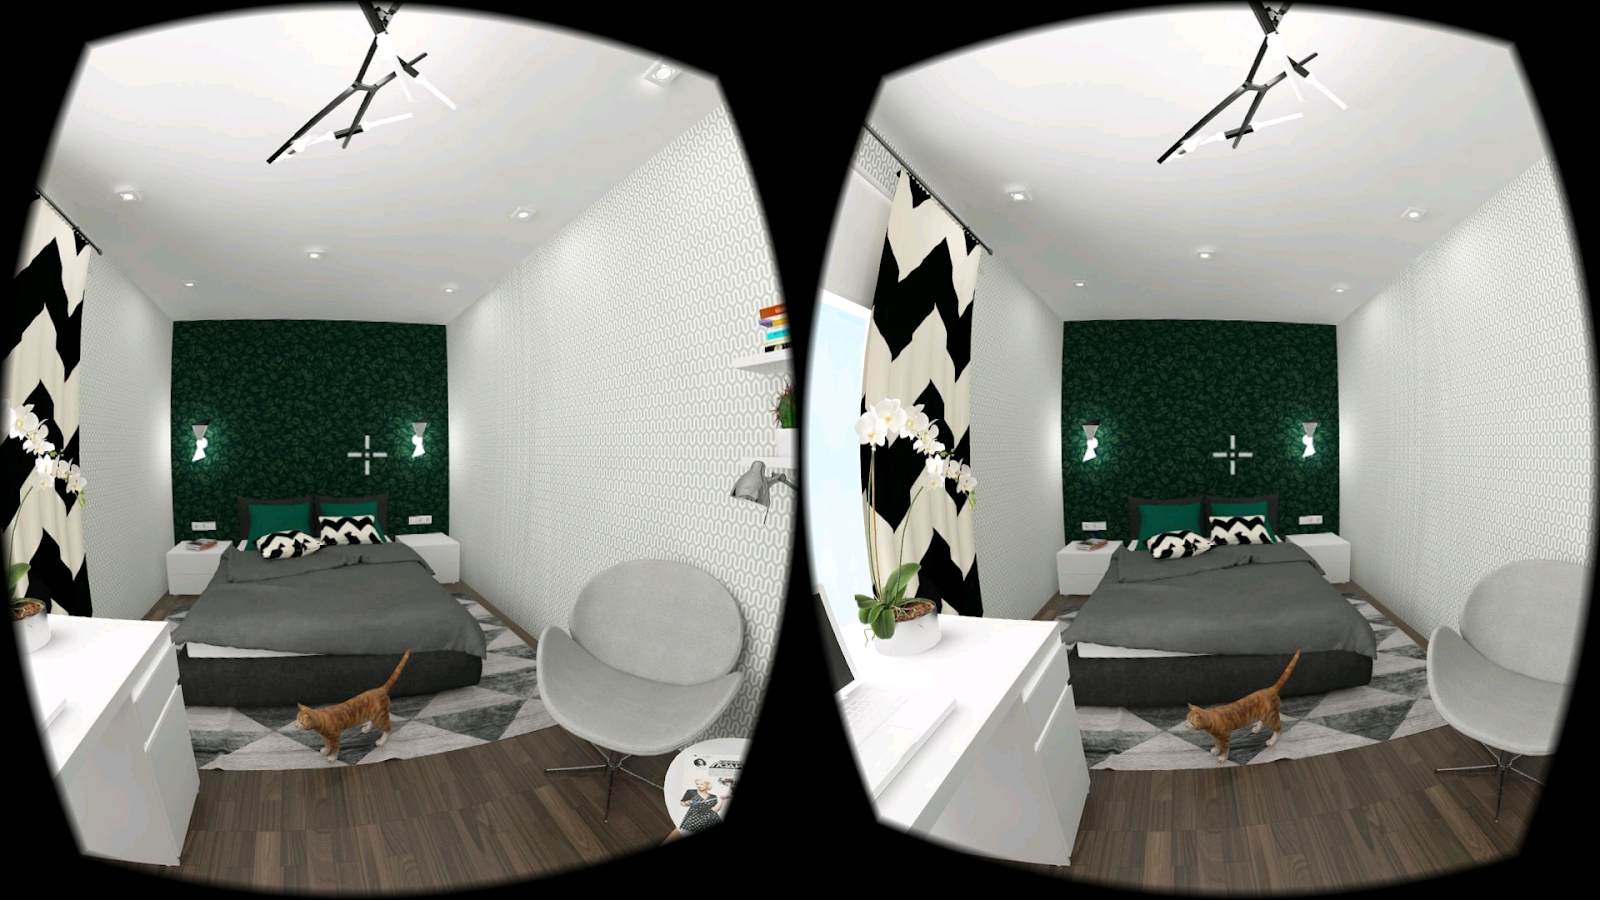
For this I installed it on the phone app Planoplan GO! (it is for Android and for iOS), made the VR-panorama, scaned the QR code, and eventually saw her bedroom on the phone screen. It feels like you’re inside. By the way, if you take even the simplest virtual reality glasses, such as cardboard Google Cardboard, which today where not only are sold, they can be used to look at your interior from the inside. Not to mention the virtual reality helmet. Can’t imagine how cool it is! But even without my glasses I was very impressed.
Anyone interested to experience the charm of VR-panorama after installation of the application example available ready apartments, and you can make it a virtual tour. Unfortunately, my video is not very good quality, but believe me, with the phone still looks much more refined and better.
Well, now it’s your turn – share your experience with similar programs to create interior! I’d be happy to hear comments, both positive and negative experiments) And another question: in your opinion, with planning the interior is better to consult a designer or make your own?


