


We make cabinets to order. Sent to the client Gager and consider all that is possible to take into account. But then, when I come to mount the finished product on the object — there are contingencies. The wardrobe does not arise where it is necessary, there is a need for something to be cut on the spot.
Why is this happening?
Yulia Russian
The righteous anger of the customer translates to workers of the furniture workshop: “what were you holding the tape measure measurer, could warn you…” But alas, sometimes to warn could not. Because were not even aware of some design decisions (when the repair is parallel with the manufacture of furniture). And your team therefore does not think that the Cabinet installation can cause problems.
Tell me what are the problems faced by our measurers and how they can be avoided.
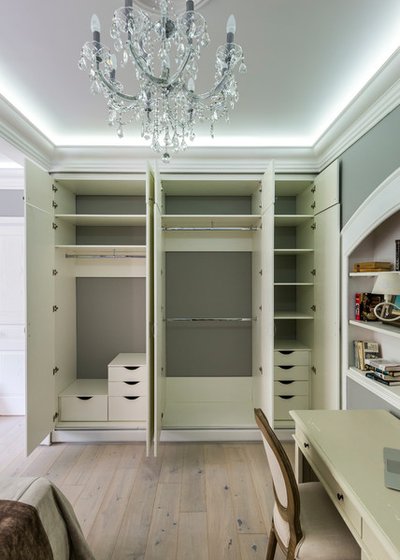
Studio Enjoy Home
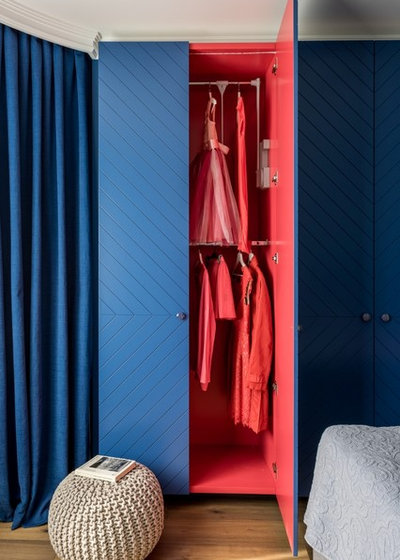
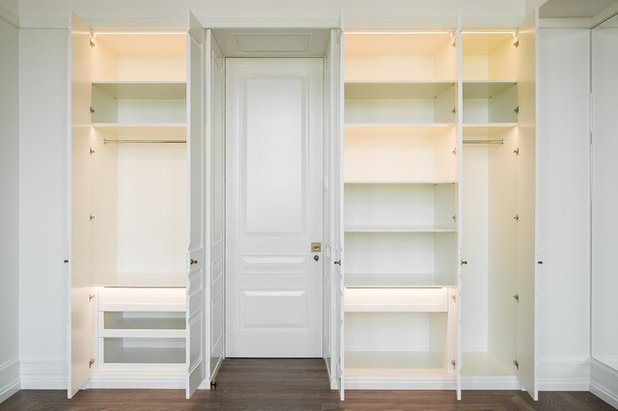
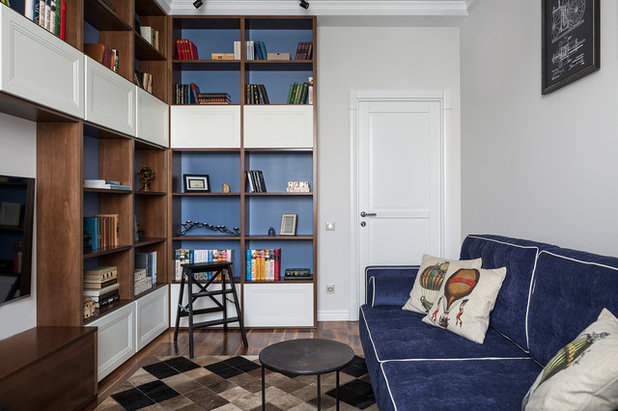
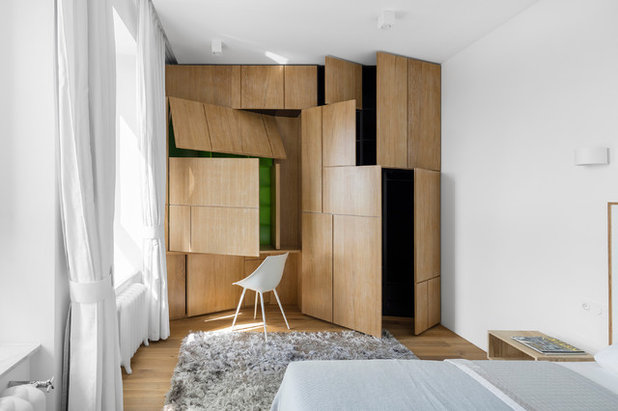
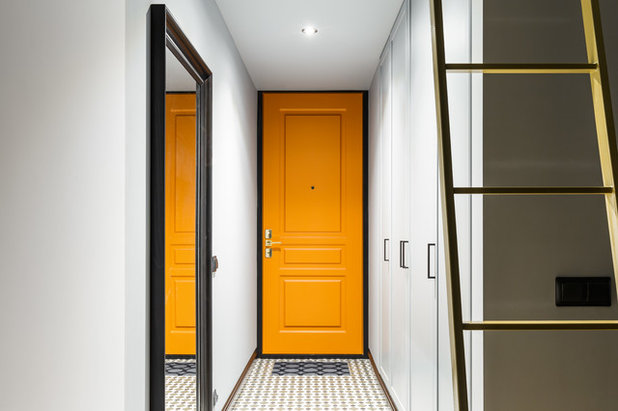
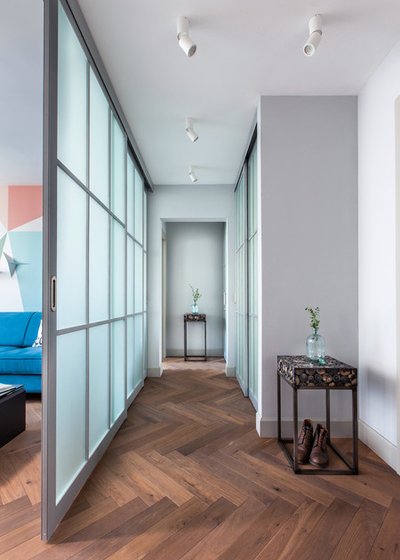
Problem #1: Wardrobe is not included in the niche, although the measurements show no error
Built-in furniture is made from smooth materials and the walls and ceilings in our homes often have appreciable curvature. Sometimes this curvature is not visible to the eye. The discrepancy in centimetre or so, with a hill protruding sections somewhere in the Central part of the wall or ceiling — and the rack no longer stands.
Solution: First, geometrically perfectly align walls, corners, ceiling. And then to call on the object Gager. Don’t expect miracles: the protruding portions are guaranteed to cause “cracks” on the edges near the walls or ceiling.

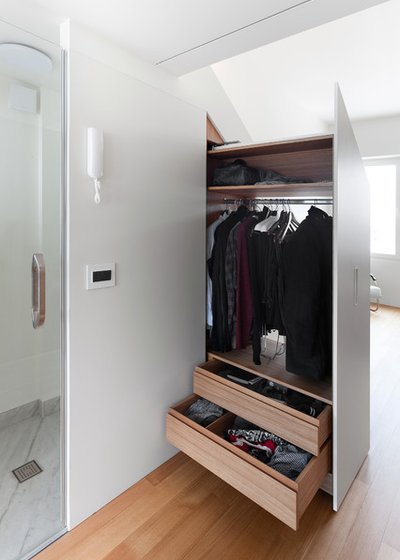
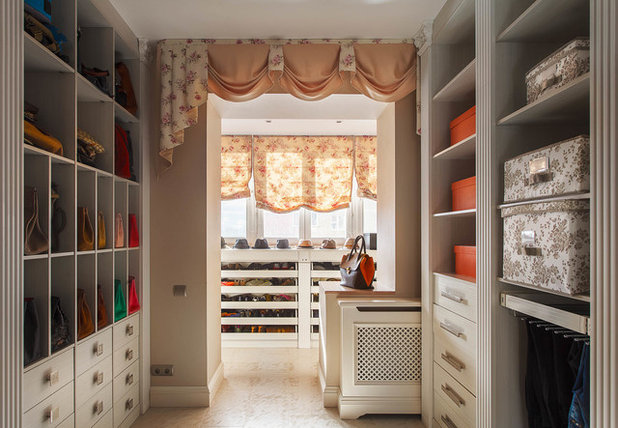
Day True
Example photos open in full screen. The curvature of the ceiling disguised felisblanco, painted in color of facades and filed on the spot by the size of the gap between the top of the Cabinet and the ceiling
If the repair will not: Tell the measurer that the repair is not planned, so you need to take into account all surface defects during the measurement and manufacturing of the Cabinet. When the curves of the corners of the shelves of the Cabinet are adjusted to them on the spot (rasp in places of an adjunction to the wall). In these places will not be furniture edge is bad because the moisture from the wood can swell. And some companies have surcharges in excess of agreed estimates for each gash.
Possible solution — to make the wardrobe a little less than the required size, adjusted for the curvature of the walls and close the gap felisblanco.
Svetlichnaya Aliona, technologist service Gembo
Problem #2: Put the wardrobe, and he looks “overwhelmed”
Measurer focuses on vertical and horizontal level. But not always they are guided by the builders with the installation of doors, Windows, installation of the sill. The divergence of two straight lines in a prominent place is evident. Most likely, you will not be able to get used to it.
Erica Bryen Design
Solution: If the casing is installed crooked, and the rack is installed next to it, there are two options. The first is to put the wardrobe on the technology, then a hinged door will look crooked relative to the casing. The second is to take for the vertical door trim and put the rack with slight inclination, “in parallel” to it. Gaps in the ceiling or in a corner to mask by color, or perhaps Wallpaper with pop art prints, which conceal irregularities.
ABOUT IT…
Question: how to disguise the curves of the walls
Polina Poludkina
Example in photo: an elegant solution to get rid of the frames altogether. Turn false panels (wall) Cabinet in a “portal” that frames the entrance
QT INTERIOR DESIGN
Example in photo: blinds to hide the uneven gaps between the window and framing his storage system
Fact: If you plan to install the cabinets close to the window or want cabinets framing the window opening — correct first perfectly align the slopes and / or ReWire the window. Without this, the window sill, rolling in the countertop of the kitchen or chest of drawers, not a mount.
Le Atelier
Important: All window must be completed before the call Gager. Installed window sills, radiators (if necessary) replaced. Plan to close their screens? First, install the screens, then think about the wardrobe door. After the measurement of the changes in the interior should not be allowed gluing or painting Wallpaper, otherwise, would require additional metering.

Elena Khrustaleva
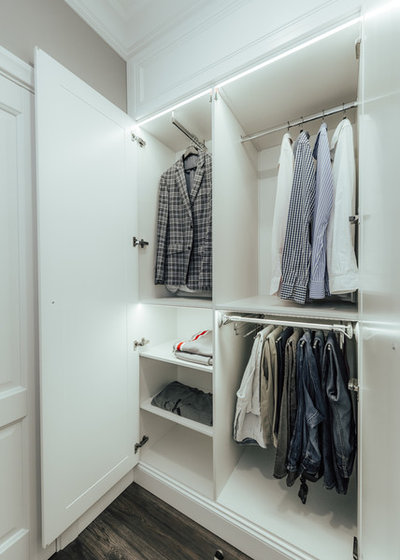
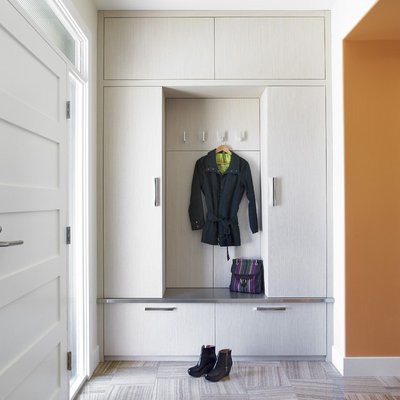
Problem #3: Things inside the Cabinet crumple
Common situation with built-in wardrobes in the recess when the depth of embedding “border”, about 60 cm Seems to be all right — for clothes on hangers and the required depth of 60 cm, But if you do doors, the system eats up to 10 cm of these sixty. As a result, for standard rods is not enough. Usually Gager, who warns about that, shrug: shoulders-that less than 50 even, they say, “let’s go” and with such wide.
Solution: Order end post. Or (if the niche is being built under the wardrobe) — to plan it a little deeper than 60 cm.
Furniture Bureau Astapovich
On the photo: the case when a built-in wardrobe clearly “avoided” some kind of ledge in the corner of the room. Because we see the shallow and narrow section (with end bar) and the main, wide
Britz, Anna ArchIdea
Note how much space is “comfortable” to leave from the edge of a coat hanger to door (approximately at this level to the edge of the built-in end chests)
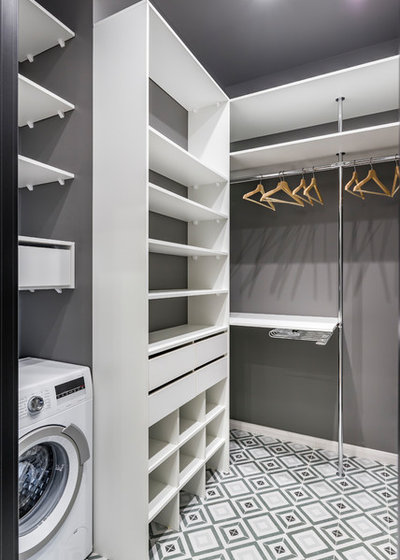
Studio Bazi
Idea: If the niche is to be embedded a bit deeper than necessary, you can organize pornovidio section (accessed by clicking)
Britz, Anna ArchIdea
Problem #4: In the closet or dressing room there was a smell
Not of ventilation is provided or the outputs are closed when assembling furniture. It happens when washing and / or drying machine is installed in the finished Cabinet or closet. The humidity disappears, the bacteria multiply, there is the smell.
Solution: Expect the washing machine in a cupboard — take the door with perforation. Assuming the rack in the dressing room — think about forced ventilation inside the Cabinet.
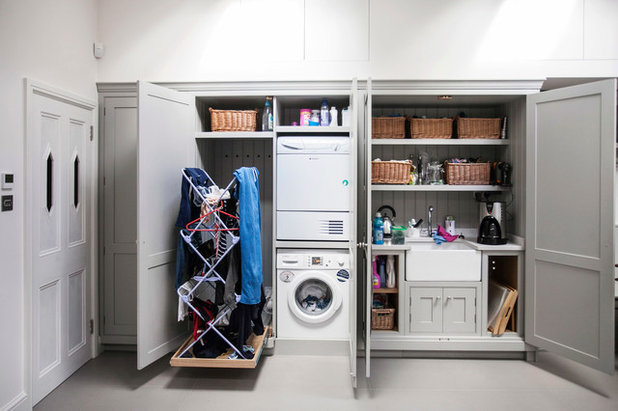
burlanes interiors
Make sure that the vent does not hit the mounting area of the Cabinet, otherwise its very presence in this room will be useless.
Elvira Stankevich
Problem #5: Not thinking about the switch
Typically, switches are located at the entrance at a distance of 5-15 cm from the door opening. Sometimes cabinets and do not need to get close to the door (and conceived). But in most malogabaritok wardrobe trying to put wall-to-wall. To reduce it because of the switch — means to lose in functionality.
Solution: Move the switch to another location before sampling. Or prepare to immediately after mounting the Cabinet to ReWire the switch on the side panel.
raumplus
Photo: an example of a switch mounted directly on the wall Cabinet
Holzrausch
Photo: an example of partition which was erected for the decoration of niches and built in wardrobe. The partition brought the intercom
Flatsdesign / Evgeniya Matveenko
Problem #6: the Door does not open fully, hits the ceiling
Possible sources of light (or the ceiling for them) has changed after the measurement of the furniture. A repeated measurement was carried out.
Solution: If you plan on flat or overhead spotlights, mount them before cause zamerschika. You can always calculate the Cabinet so that the lamp was outside the area of the door opening. For example, in the photo the Cabinet has planned not to the ceiling — so that the doors do not touch the bulb.
Maxim Kashin
On the photo: probably a broken door openings were designed with an eye to the bulging ceiling
“Zenit STP”. Architectural plaster lamps
On the photo: it is seen that the lamps do not interfere with the door opening and positioned symmetrically Cabinet doors — good planning. Also see what is considered the depth of structures and fixtures do not fall into the area of the Cabinet
Porte Rouge Interiors
Problem #7: Put the wardrobe collapsed symmetry
Tile carpet “suddenly” broke off from the Cabinet. Or walked closer to him than the indent on the opposite wall. Or line of lamps in the long corridor was not centered, but shifted closer to the Cabinet.
Solution: Plan double the measurement. The purpose of the first is to determine the location of the Cabinet, its dimensions. Then the object is spread as desired carpet tile, do the ceiling mounted fixtures (stepping back an appropriate distance from the Cabinet). Now zamerschika invited a second time to specify the height on which rose the coating. Wardrobe start production.
Alexander Nikulin
Example in photo: below wardrobe was exactly on the diagonal tiles, you need to plan the installation taking into account the laid covering. Either lay the tile based on the size of the ordered wardrobe
Interior Studio AI
Example in photo: lamps (tile and carpet) moved the amendment in a closet. Don’t be a Cabinet on the right, the center of the corridor had to be on another place
ADesign
Problem #8: Started a warm floor in the place where there will be a built-in wardrobe
What is bad: Heats up that heat no need. Are wasting money. And due to the constant heating body can be changed. As a consequence, boxes will start to run smoothly, and with effort (and you’ll blame masters).

MARION STUDIO
If the floor is tile, the measurer is likely to ask you myself — I wanted to check if you happen to the mats in this place. And if it is about laminate or whiteboard (technology allow you to heat them) the measurer to guess about the warm floor is quite difficult. Especially if heating is disabled during repair.
Solution: don’t make a warm floor in the place where it will be wardrobe. It does not matter whether this Cabinet on a plinth or on legs.
____________________________________________
Suite n. Seven
Problem #9: Too dark, can not see anything on the shelves
Perhaps initially it was planned because of insufficient number of light sources. Either they are badly located: you of his own shadow blocks her view.
Solution: If you plan to use your light in the closet, still under repair, it is important to lay a cable over the roof of the future product.
Photo: the cable for the backlight of the furniture is still under repair, then it will be impossible
Special-style
If the ceiling is already done, lighting done, but it is not enough — an additional mirror. Water reflecting the lamps provide two times more light. Alternatively, make a mirrored mezzanine front cabinets. Or think about the mirrored soffits window. A good idea is to buy in the dressing room “dressing room” mirror with its own lighting on the perimeter.
Jours & Nuits
Problem #10: broke the cable during the installation process
When installing built-in furniture is easy to break the cable tool. And then half a flat (if not all) will be de-energized, will have to tear down the wall and re-pull the power.
Solution: Prepare for the arrival of the pickers. Give them the layout of the wiring. Otherwise everything is just under your responsibility. When installing cabinets you need to know the schema of the flush, and where in the rear wall to make holes for the wires. The wires should be removed before sampling to design the rack and to plan openings at the production stage.
Studio Enjoy Home
Problem #11: the Skirting Board already bought after the measurement of the furniture and not discussed anything with the measurer
What is bad: If you ordered a sliding partition between kitchen and living room, the skirting may prevent the move of the doors.
The Sky is The Limit Design
Built-in wardrobe, too close not to put the skirting will have to be sawed. The least of the problems with skirting boards laconic rectangular cross section. But their master would be good to take into account in the calculations.
Solution: the Plinth or set UP measurement and installation of doors, or the measurer needs to know the firm and article of floor to account for its size in its calculations. When installing a built-in wardrobe, skirting shall be installed after installation.
Sometimes it’s easier to rip the skirting Board in the alcove where the installation is planned. But this is also not good, as the finish can deteriorate and it will be seen (for example, if a Cabinet without a back wall).
Karina Rimik
Example in photo: note left-hand plinth. It is evident that it is installed after the installation of the storage system, otherwise we would have had to saw through a hole under it in the side panel of the Cabinet. Hidden radiator in the box, most likely made by the same company as the storage system, and means were taken into account at the stage of measurement
Heartwood Corp
Example in photo: the saving option on the frame of the dressing room and at the same time — solution of the partial dismantling of the plinth (the one on the wall with the window stuck after the installation of the rack)
K BAND
Important: the Plinth is mounted after installation of the Cabinet, so you don’t have to cut under it holes in the sides of the product (during the installation). If the baseboard is not planned in the area of turn door, you need to take this into account at the stage of laying the floor finish so there are no gaps.
Dmytro Aranchii Architects
Problem #12: the Finished product is not included in the delivery
Why: After metering was installed on the routes of introduction of additional wardrobe furniture, erected plasterboard partitions, etc.
Solution: If you plan to order large sliding doors (compartment or partition), usually delivered assembled. Think about whether they will get to your doorway. You do not have to take the product via a balcony or dismantle the door frame.
For example, in the photo on the left are the large doors to the ceiling (270 cm), width 90 cm — you need to plan how to deliver them: through the entrance / door or window / balcony.
Julia Piskareva/YOLO Bureau
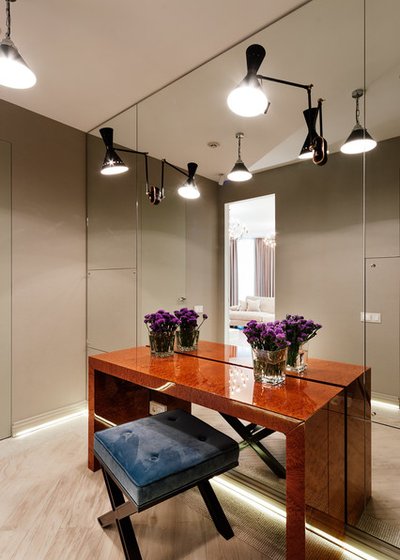
Compare the photo with the mirror a cloth the previous one. These can be easily disassembled into sections and assembled on site; will fit in any Elevator. SLR, most likely, had to raise the hand up the stairs
Chernysh Oksana
Instead of conclusions
IT’S YOUR TURN…
Among our readers are many practicing interior designers. Share force majeure, which arose at the time of installation of furniture. You need to consider that this did not happen?


